Are you in search of a portable and less expensive soft box to use while you save up enough money for the professional brand? I have created many of my own DIY soft boxes over the years and you can too. You can make them any size and they have multiple uses! A DIY soft box can serve as a light diffuser/modifier, a reflector and the substitute black rip-stop fabric doubles as subtractive
lighting.
I like to use this DIY soft box indoors and out. If you have a breezy environment, the 1” PVC tubing is more rigid than the ¾” tubing. You also need to decide if you would like one that is portable. You don’t need to glue the PVC since it sticks together pretty good unless you get into a windy
situation.
The nice thing about the white rip-stop material is that it’s extremely durable. It doesn’t rip easily and if you happen to poke a hole in it, the hole won’t get bigger. The fabric is lightweight and diffuses just enough of the light to make it soft, but not so much that you loose too much illumination.
So, what else can you use these panels for?
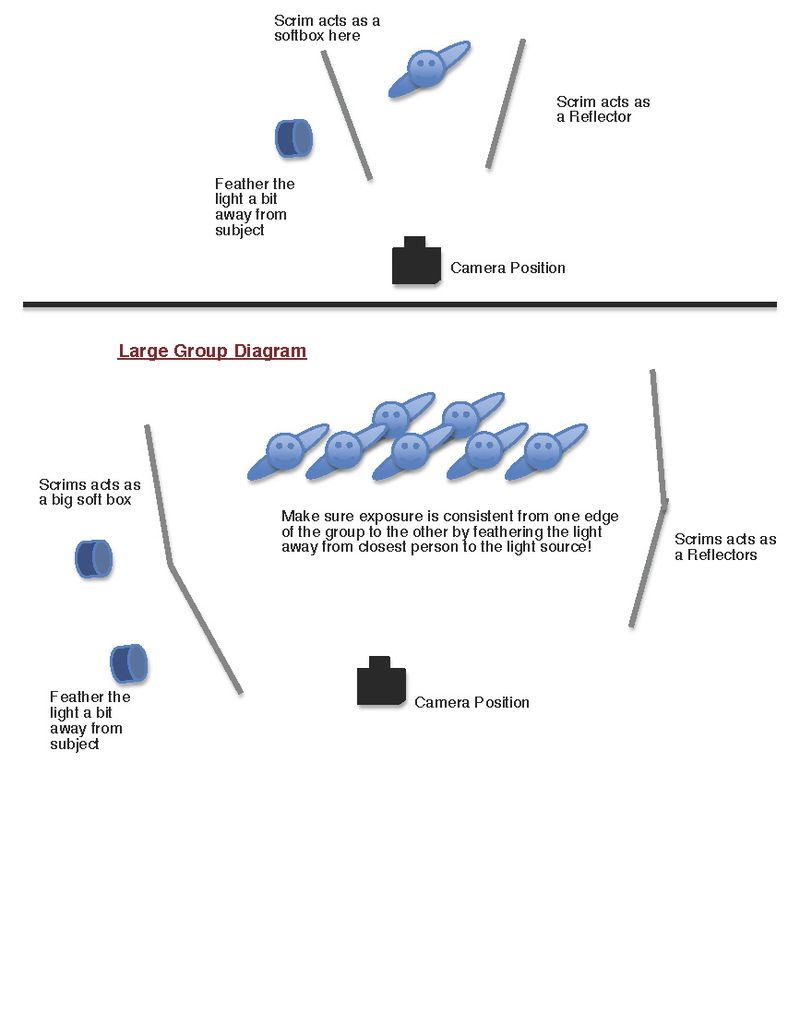
- Shoot a strobe through them to serve as a large soft box.
- Hold them over a subject’s head to diffuse the mid-afternoon sun.
- Switch out the white fabric for black and use them for subtractive lighting.
- Peel down a corner to let some of the light spill out on your background or subject depending on the look you’re after.
- Hang the frame with black fabric on your wall to keep light from bouncing in your high-key area.
- Use it as a gobo between you and your subject to prevent lens flare under certain circumstances.
- Simulate north window light by combing 2 strobes and 2 soft boxes side-by-side. A 7’x8’ soft box can be very pretty.
You won’t have the light head contained in this setup, but that’s okay. Even though it’s not as efficient as a covered head, it still makes a wonderful modifier. You can experiment with how far to position your strobe from the fabric to fit your taste. I tend to keep mine 3 or 4 feet back, sometimes more. I like to angle the strobe head slightly up from the floor and away from my subject.
There is a more professional (complex) way to build these panels. Dean Collins first introduced these designs back in the 80’s. Here is a link to get Dean Collins Tinker Tube instructions – http://www.software-cinema.com/page/13/tinkertubes. My instructions are more simplified, but they fit my skill level and patience. While it’s not as fancy, you can build it in no time and be ready to use it quickly. Here’s what you need:
¾” PVC/40 Pipe –
Available at any hardware store (you can also use 1” if you prefer. Just substitute all sizes
accordingly. If you plan to use them outside, I would recommend the 1 inch.)
5 – ’¾’ PVC/40 Pipe
L = 8’ (source for all straight pieces)
4 – ¾” Elbow 90 degree PVC/40 for corners
3 – ¾” Tee PVC/40 for connectors
1 – ¾” connector to connect 2 straight pieces
Fabric – To slip on the frame.
Rip-stop Nylon (white)
http://www.amazon.com/Vogue-Fabrics-Stop-Nylon–White/dp/B006ZE3OOO/ref=sr_1_16?ie=UTF8&qid=1358201541&sr=8-16&keywords=ripstop+nylon
Elastic Straps – To connect the fabric to the frame. You’ll need to glue elastic to the each of the
4 corners of the rip-stop fabric at 45 degree angles about 7 inches from each corner. This allows you to quickly attach or detach your fabric.
4 – Elastic Straps
http://www.walmart.com/ip/1-1-2-Heavy-Waistband-Elastic-White/19767423
Fabric Glue –
Adhere the elastic with this glue. Only glue the ends of the elastic onto the fabric! Any permanent
fabric glue will work. Look for a bottle similar to this – http://www.allstitch.net/product/fabritac-permanent-adhesive-large-10-oz-bottle-3813.cfm?aid=FABTAC-8&sid=googlebase&gclid=CLqBzejr6LQCFSemPAodtxcAWg
PVC Cement – Use this to make your pipe connections permanent. I tend to leave the corners
unglued so I can break it down for easy storage or portability. I lay my pieces on top of one end of the rip-stop material and roll it up. The elastic straps can keep it all together.
Saw –I use a regular back saw with a miter box to cut the pipe. Here’s a link that explains different options –http://www.hammerzone.com/archives/plumbing/technique/pvc/cutting/sawing_pipe.htm


